How the Captions Program Works

Step 1
Step 1
Step 1
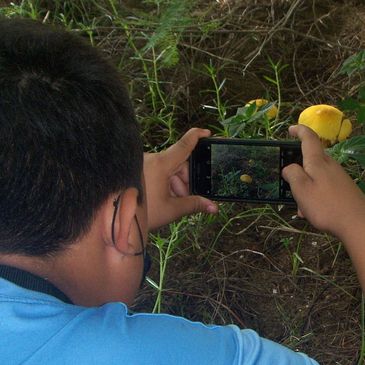
Student takes a photograph or short video on her or his cellphone or digital camera, or downloads an image (citing the source) from the Internet.

Step 2
Step 1
Step 1
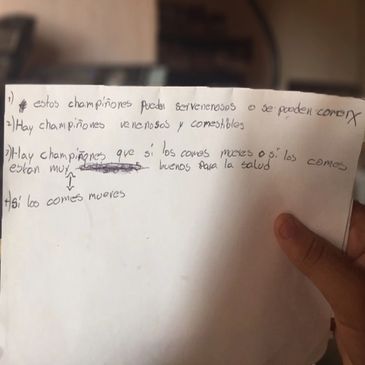
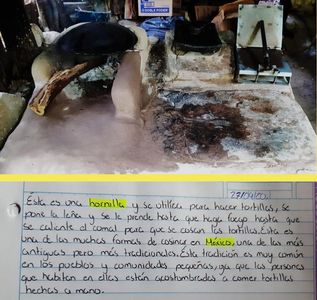
Student writes a story or caption that goes with the image. The length of the story or caption could be as short as a few words, or as long as a 3-sentence paragraph.
Step 3
Step 1
Step 3
Student sends the image and caption to the captions editor. For images from the Internet, the editor helps the student compose a professional email to procure permission.
Step 4
Step 4
Step 3
The editor checks the caption for errors in spelling and grammar. The editor also checks for language consistency and, if necessary, offers suggestions to improve the writing.

Step 5
Step 4
Step 5
The editor returns the student’s work with proofreaders’ marks and edits in the margin.

Step 6
Step 4
Step 5
The student incorporates the corrections and optional edits.
Step 7
Step 8 (optional)
Step 8 (optional)
The editor prepares an individualized worksheet that reinforces correct spelling, grammar, punctuation, style, and vocabulary selection.

Step 8 (optional)
Step 8 (optional)
Step 8 (optional)
Students learn photographic techniques by looking at and analyzing examples of images from newspapers, magazines, museums, and photo banks.
Context for Student Writings and Photos

Journalism That Reinforces Topics of Students' Greatest Interests
We start working with students by asking them to write about a topic which they enjoy or of which have deep knowledge.

Journalism That Reinforces School Topics
After developing an enjoyment of writing, we ask students to research and write about topics related to class assignments, and photograph a person or image related to that topic.

Multiple Types of Writing
We ask students to produce expository, descriptive, persuasive, and narrative writing.

Project-Based Assignments Beyond the Classroom
Students have extended opportunities to expand their photojournalism projects with field trips, designing, building, and writing about 3-D printing, using computers to post-process photographs, visiting giant telescopes, and participating in other activities.
Elements of an Effective Image in Photojournalism
Sharp Focus

Is one person or object essential to the topic you are covering? If so, perhaps it should be focused neatly. Many photos are slightly blurry, which is okay if it is an image to be used in an advertisement where the text message would be in focus.
Depth of Field

The distance between the closest and farthest objects that appears acceptably sharp. An image with a deep depth of field will show objects both close up and far away in focus. An image with a shallow depth of field, on the other hand, shows a small or narrow area in an image in focus. The background or foreground may be blurred.
Color Balance
Color Balance

Rendering and adjusting the intensity of colors accurately. A goal is to render colors—in red, green, and blue for a computer screen; in cyan, magenta, yellow, and black for printed material—correctly. Tint, tone, and shade sometimes need to be altered.
Composition
Color Balance

Where do your eyes focus in an image. Composition is how the photo elements are arranged. A few well-known established conventions are Rules of Thirds, Leading Lines, Patterns, Simplicity (cutting out distractions), and Negative Space.
Point of View

Point of view refers to the position the camera is in when viewing the scene. Is the photographer at eye level, ground level, or above the person or items in focus? Subjects can be distorted by camera position as well by the type of lens used or filter applied.
Lighting

Lighting in photography is the illumination of a scene. Soft and hard lighting help determine the mood...dreamlike, romantic, factual, etc. What is your source of light? And from which direction does it originate in your photo? Too little light and the image is dark. Too much light and the image is washed out.